
Build successful applications
Learn how you (developer, engineer, end-user, domain expert, project manager, etc.) can contribute to the creation of apps that provide real value to your work.
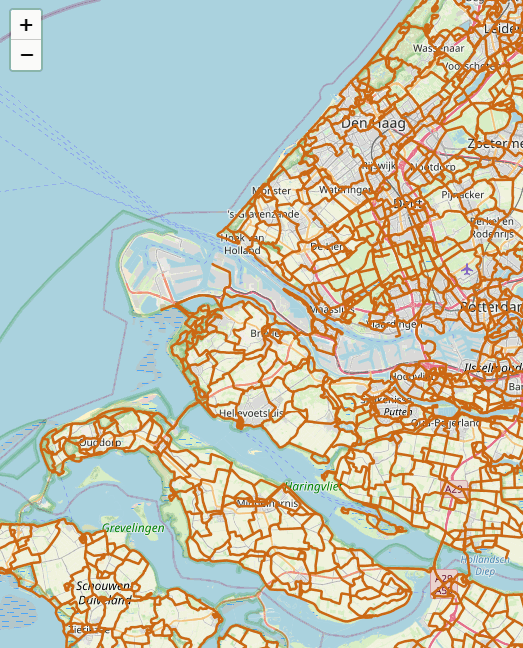
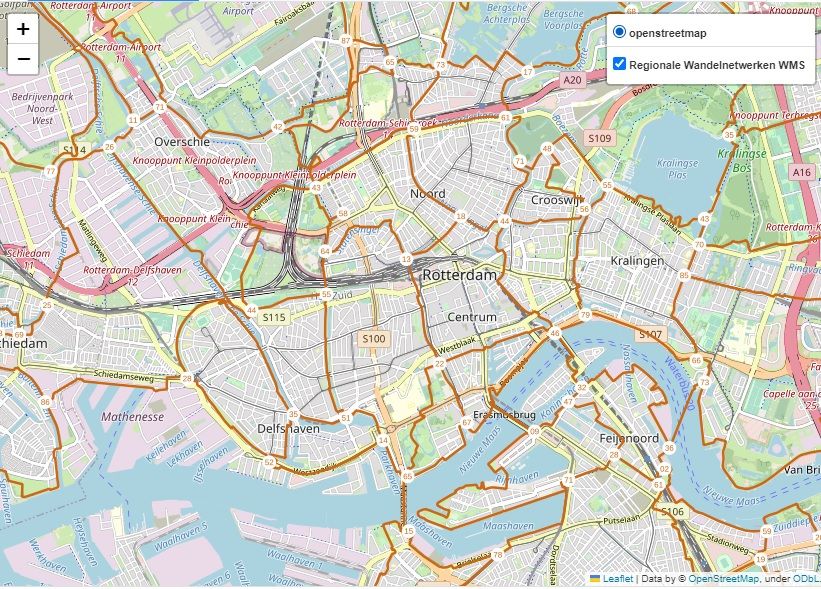
On the image below a WMS layer of hiking trails around Rotterdam is shown.
What is WMS?
WMS is a standard protocol for serving georeferenced map images over the internet that allows users to request and receive geographic data in a standardized format. Simply said, it allows users to share GIS-data over the internet.
Some beneficial properties of a WMS layer are:
- Access to High-Quality Data WMS layers offer current, high-quality data.
- Integration A WMS layer can be added or removed from a map, without having to start over from scratch.
- Cost-Effective WMS layers are served over the internet, so they don't need to be stored locally.
- Improved Collaboration Adding a WMS layer to your map can make it easier to collaborate with others. For example, if you're working on a project with colleagues, you can all access the same WMS layer to ensure that everyone is using the same data. This can save time and reduce errors, which can ultimately lead to a more successful project.
Difficulties in adding a WMS layer
It can, however, be challenging to add a WMS layer to your map. When you have no prior experience to this subject and are trying to get into it, it might cost you more time than you anticipated. Two of the main obstacles are:
Identifying the Appropriate Layers: To add a WMS-layers, the layers need to be identified. They are hidden in the XML of the WMS, which can be hard to read. Alternatively, QGIS can be used to identify the layers. While this might work fine for some, it can be a hurdle for others.
Finding the Base URL: Depending on the source of the WMS, identifying the base URL varies. While it is not the most difficult process, it can sometimes be a bit confusing. Mostly because of the lack of error message when done wrong.
Retrieving necessary information from WMS
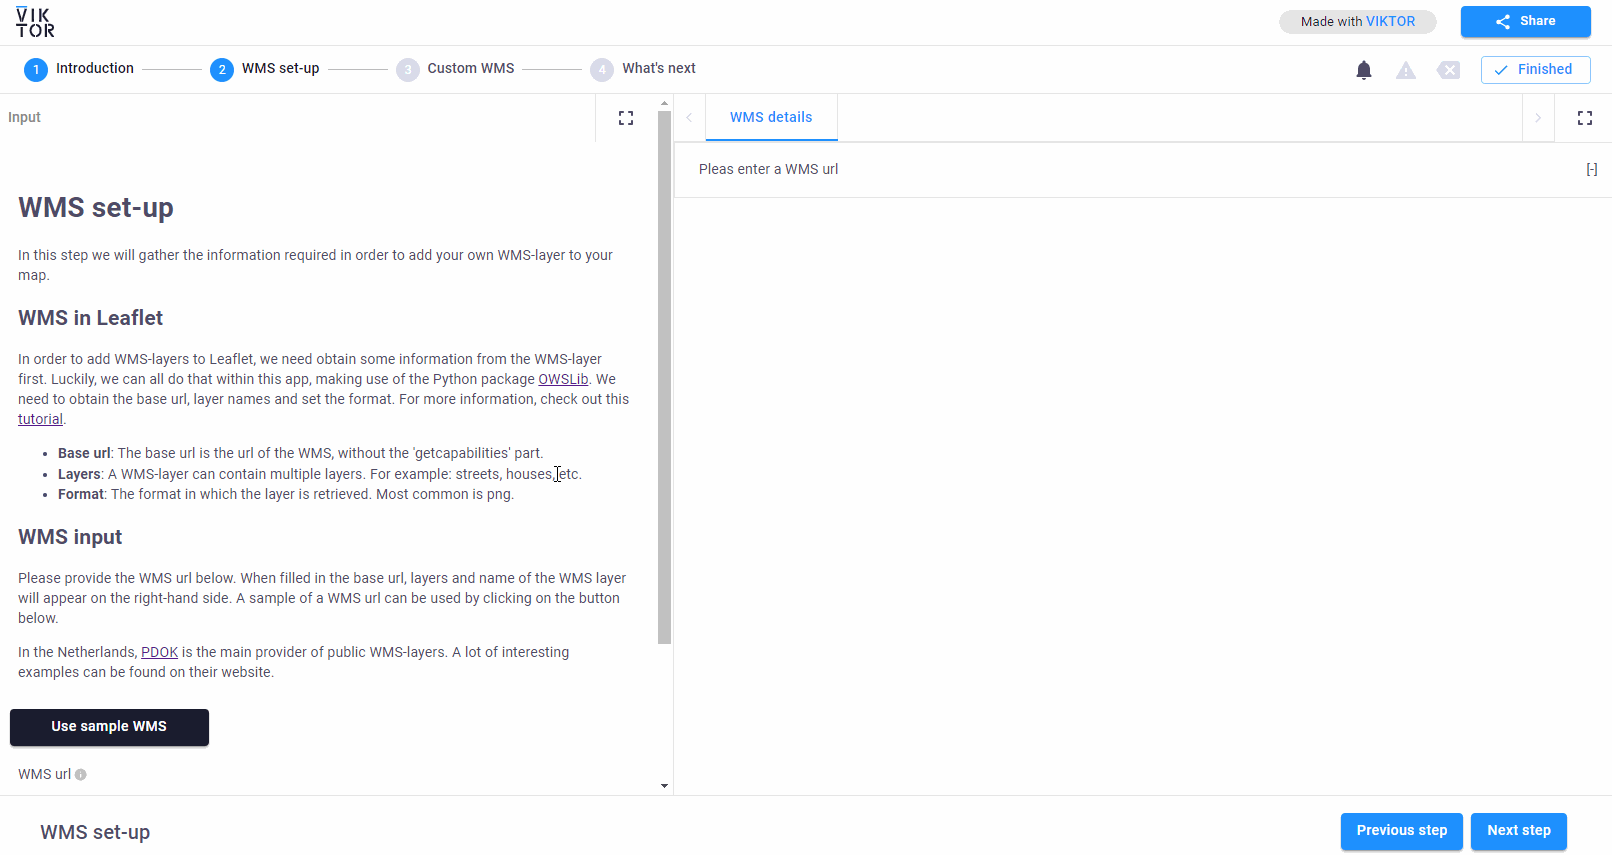
Luckily, this VIKTOR-app will aid you in this process. Using this app it is very straightforward to add a WMS-layer to your map.
Open the app, which can be found in the VIKTOR Apps Gallery. In the first step is demonstrated what the result could look like. Go to the next step. Now, paste the URL of your WMS layer in the designated textfield. If you don't have your own WMS-data, click on the button "Use sample WMS". The results will appear automatically on the right-hand side. If done correctly, it should show the base URL, layers and name of the WMS. In the remaining of this article, the sample data from the app is used.
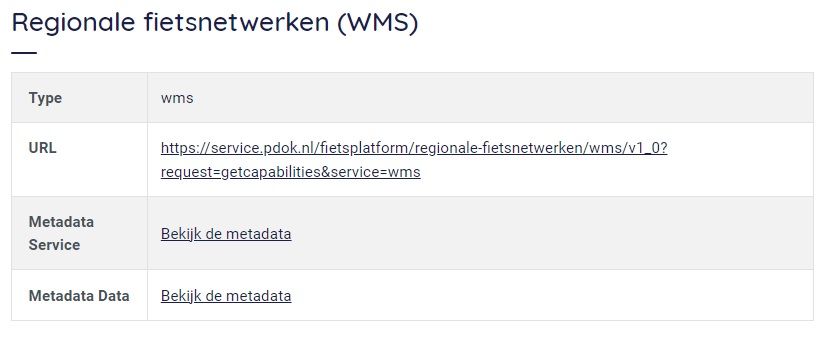
The sample WMS contains data hiking trails in the Netherlands. This WMS layer is made available by PDOK, which provides a lot of useful WMS-data in the Netherlands. Feel free to browse on their website to find some interesting examples for WMS-layers. Simply copy the WMS link as shown on the image below.
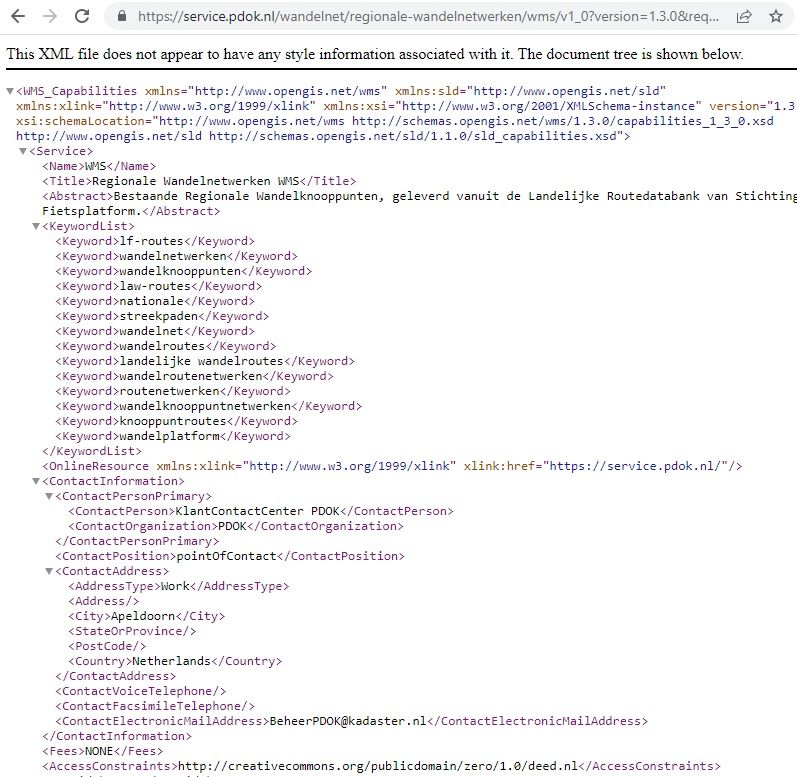
When going to the URL of the WMS layer, you will arrive on the XML.
This page contains a lot of information which can be hard to read for a human. A computer, however, can extract all the necessary information from this page, which is exactly what we have done using this app.
Adding a WMS-layer to VIKTOR
Now that we gathered the necessary information from the WMS, we can add it to a VIKTOR app. In this example the WMS-layer is added using the Python library Folium. Folium is essentially a Python-wrapper for Leaflet. And Leaflet is a powerful open-source JavaScript library to create interactive maps. To avoid having to write JavaScript ourselves, we can instead use Folium, which translates the Python code to JavaScript for us.
Creating a map with folium is very easy:
1    import folium
2    m = folium.Map(location=[51.922408, 4.4695292], zoom_start=13)
In this example the location is set to Rotterdam and a level of zoom is specified.
Now, to add the WMS-layer we just do:
1    folium.raster_layers.WmsTileLayer(
2        url="https://service.pdok.nl/wandelnet/regionale-wandelnetwerken/wms/v1_0",
3        layers=["wandelknooppunten", "wandelnetwerken"],
4        transparent=True,
5        control=True,
6        fmt="image/png",
7        name="Regionale Wandelnetwerken WMS",
8        overlay=True,
9        show=True,
10        version="1.3.0",
11    ).add_to(m)
Just replace the URL with the base URL we just obtained from the app. The same goes for the layers. Multiple layers can be added at once in a string, as shown in the example above. Change the name and we are all set! All the other options can be left as they are now.
To add layer control to the app we just add the following:
1 folium.LayerControl().add_to(m)Now we just need to display the Folium map in VIKTOR. This can be done using the WebView. This is a powerful feature of VIKTOR in which any HTML code can be shown. To convert the Folium map to HTML:
1    html_result = BytesIO()
2    m.save(html_result, close_file=False)
That's it! Adding everything together:
1    import folium
2    @WebView("Leaflet sample map", duration_guess=1)
3    def leaflet_introduction(self, params, **kwargs):
4        m = folium.Map(location=[51.922408, 4.4695292], zoom_start=13)
5
6        folium.raster_layers.WmsTileLayer(
7            url="https://service.pdok.nl/wandelnet/regionale-wandelnetwerken/wms/v1_0",
8            layers=["wandelknooppunten", "wandelnetwerken"],
9            transparent=True,
10            control=True,
11            fmt="image/png",
12            name="Regionale Wandelnetwerken WMS",
13            overlay=True,
14            show=True,
15            version="1.3.0",
16        ).add_to(m)
17
18        folium.LayerControl().add_to(m)
19
20        html_result = BytesIO()
21        m.save(html_result, close_file=False)
22        return WebResult(html=StringIO(html_result.getvalue().decode("utf-8")))
Just paste this code in your VIKTOR-app and it should display the WMS-layer, including a layer control for the map. Now you are all ready to start adding WMS-layers to your own VIKTOR apps! Good luck!
Other resources
For more information on Leaflet check out this Leaflet tutorial.
For more information on Folium, make sure to have a look at this Folium tutorial.
For the source code of the WMS-app, have a look on VIKTOR Github.