
Behind the application
The Lekdijk dike protects a large area in the middle- and western parts of the Netherlands from flooding. If this dike breaks, a large part of the Randstad area will be prone to flooding. That is why part of the dike between Amerongen and Schoonhoven is being reinforced over a total length of 55 kilometers.
Innovation is an important means to achieve the (reinforcement) goals of this program. Improving calculation rules and methods is an innovation that receives a lot of attention throughout this program. For example, with an application that allows engineers to determine the risk of piping faster and more accurately. Ultimately, this leads to less drastic measures, less impact on the environment, and lower costs.
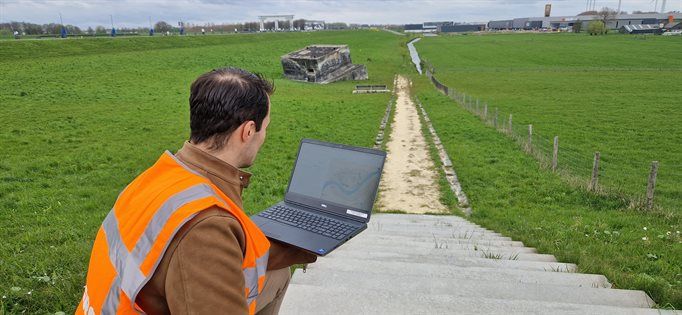
"The application was directly used on the project and immediately showed its value." - Wouter Karreman, Project manager of the tool
The piping tool
The application provides a tool for (geotechnical) engineers working on dikes, facilitating various tasks related to dike modeling and calculating piping failure mechanisms. Built by a composed development team from CRUX, RPS, and VIKTOR, using the technical capabilities, calculation algorithms, and desired flows thought up by experts from Fugro, Van Oord, Mourik, and Heijmans. The result: an application with lots of room for different scenarios based on any input! Naturally, with this many possibilities, the tool can come off as somewhat overwhelming for starters. That's why, if you run into any complications, be sure to contact our expert Roeland Weigand at rweigand@viktor.ai.
What follows here is a short summary of the Piping tool and how to use it.
"With the app, you quickly gain insight into the soil structure within the project area. You determine efficiently where there is a risk of piping and where there is room for optimization to prevent this." - Edwin Kester, Design leaden on subproject the Culemborgse Veer
Structure of the app
The main app consists of three layers:
- Dike
- Segment
- Exit point
Each layer of the app has its own editor in which you can control, inspect, and set parameters.
Alongside a project, you can create a CPT folder to which you can upload CPTs and a borehole folder to which you can upload borehole files.
1. Creating a new dike project
This is the highest level, defined by a dike crown line. You can create a new project by uploading a crown line. After this, you can upload additional information, such as:
- An entry line
- Ditch data file
- 3D ground model (supplied by TNO)
- Bathymetry file
- Dike pole file
Additionally, you can select a folder filled with CPTs or boreholes to use here.
On the dike level, it's possible to:
- Specify soil materials
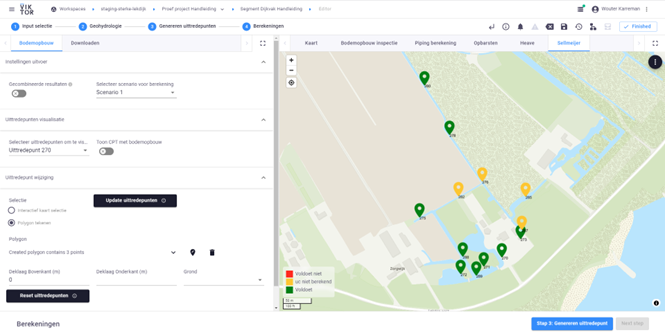
- Visualize the dike trace on the map, and inspect the 2D soil layout (see image)
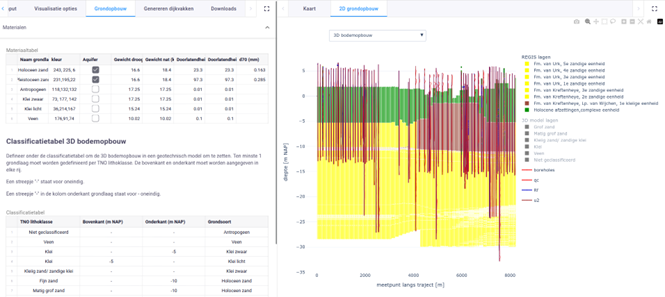
Note that the 3D TNO model first has to be trimmed down to specify region, as the complete model is very large. For this, use the “Models folder” object in the app, select where you are, and draw a polygon within the area. The app then creates a .csv file for the relevant area that you can use as the new soil model for your dike.
For deeper layers, the REGIS model is used (automatically). The main use for this layer is to generate a segment by specifying a desired name, start chainage, and end chainage. Once the segment is created you can enter its editor.
2. Calculate the segment
In the segment editor, you can go towards the actual calculations by following 4 steps:
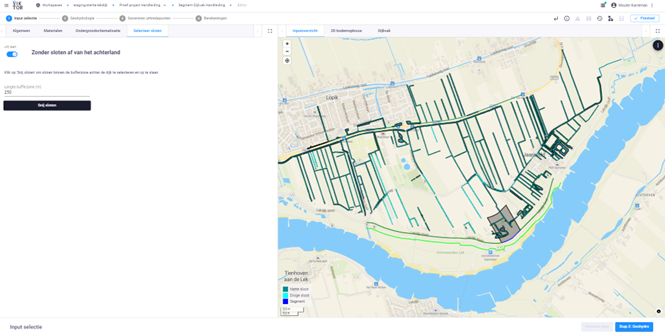
- Specify inputs: For example, to overwrite for this segment some soil material properties, specifying safety factors, selecting which ditches to consider, etc. The idea is to from a 2D soil layout to a 1D layout that represents the segment. You can specify multiple 1D layouts, called scenarios. The selection of ditches is useful because the generation of exit points at which to calculate piping is informed by the presence of ditches, either wet or dry.
- Determine water levels: You can choose from 3 different approaches to determine the water levels you will use in the calculations. Each approach requires different input. For example, the first (most simple) approach is to choose a single damping factor and apply that to the entire segment.
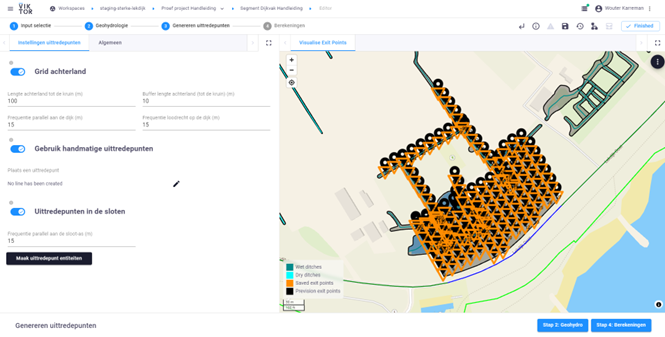
- Generate exit points: Generate exit points (points at which to calculate piping) by specifying a grid, drawing lines on the map, and/or specifying the generation of exit points in ditches (that were selected in step 1).
- Perform calculations: You can see on the map for each exit point the results of calculations for heave, uplift, and the Sellmeijer method.
3. Inspect an exit point
Finally, you can go into a single exit point to further inspect and download files for D-Stability (stix) and D-Geoflow (flox).

Disclaimer
Note that this comprehensive application was developed in a short time span – and for direct use in the Sterke Lekdijk project. Consequently, some desirable functionalities seem to be missing or you may encounter bugs (most very minor). An overview of the bug list and other open issues can be found in the backlog, which is included in the user manual in the application's repository. It is highly advised to read the manual before using the app.
Where can I find the app code?
The open-source code for the Piping tool can be found on our GitHub repository.
How can I add the app to my environment?
You can simply publish the app to your own environment by:
- Cloning the GitHub repository to your own machine
- Trying out the app by running it in your development workspace using the viktor-cli
- Publishing the app as described in our documentation
Note: to use this app, you need to have a VIKTOR environment. If you don't have a VIKTOR environment yet, you can:
- Create a free account (Python knowledge required) here
- Interested in the app but no Python knowledge? Feel free to contact our sales team at swolters@viktor.ai
Start building apps now
Related Blog Posts

Get our best content in your inbox
Subscribe to our newsletter and get the latest industry insights