Build successful applications
Learn how you (developer, engineer, end-user, domain expert, project manager, etc.) can contribute to the creation of apps that provide real value to your work.
As an engineer, we always want to automate the boring and engineer the awesome.
In this context, programming, more specifically Python, is the best available tool to automate repetitive tasks. Python has been around for many years but only recently get recognised by the larger community because of its ease of use, large extent of applications and support by huge open-source communities. It is a great programming language for data science, workflow automation and web development.
PLAXIS has a well-developed Application Programming Interface (API) which allows users to operate PLAXIS through programming. More details can be seen on the official Bentley website.
Goal
Although the PLAXIS Python API has been developed for a long time, there is still a lack of thorough guidelines to introduce this technique to geotechnical engineers. This tutorial assumes readers have zero experience in programming so I will show how to set up the programming environment from scratch.
Disclaimer
There have been a lot of paid courses which teach engineers to use the built-in Python editor in PLAXIS which I agree is quite well-developed. But I personally prefer to use my own programming environment to write scripts because of the following three reasons:
-
A well-developed Integrated Development Environment (IDE) is more user-friendly for coding as it picks up wrong syntaxes and identifies bugs, which is crucial for beginners.
-
Built-in Python editor has less flexibility to import user-developed modules. In the future when you have more programming experience, you will find that a lot of time we need to separate out the functions we write as a module which makes our script less busy. This can be well managed in IDE.
-
We don't want to keep the scripts to ourselves but to share them among colleagues. IDE provides perfect integration with code-sharing platforms such as GitHub, GitLab etc.
The ultimate goal of this tutorial is to show you how to use Python script to create your first structural element in PLAXIS 2D. This can be done with the following four steps.
- Install Integrated Development Environment (IDE)
- Activate PLAXIS Environment
- Connect to PLAXIS API
- Create first plate element
Lastly, this tutorial assumes readers are using Windows OS and have PLAXIS 2D V22 installed. So let's get started!
Step 1: Install Integrated Development Environment (IDE)
IDE is a software application which provides comprehensive facilities for programming, usually consisting of source code editor, build automation tools and debugger.
There are various options for IDE, such as Visual Studio Code (VS Code), PyCharm, Jupyter Notebook etc, which have no difference in functionality and are completely up to users' preference for the choice of IDE. This instruction demonstrates the installation of VS Code.
Install Visual Studio Code (VS Code) with the following instruction:
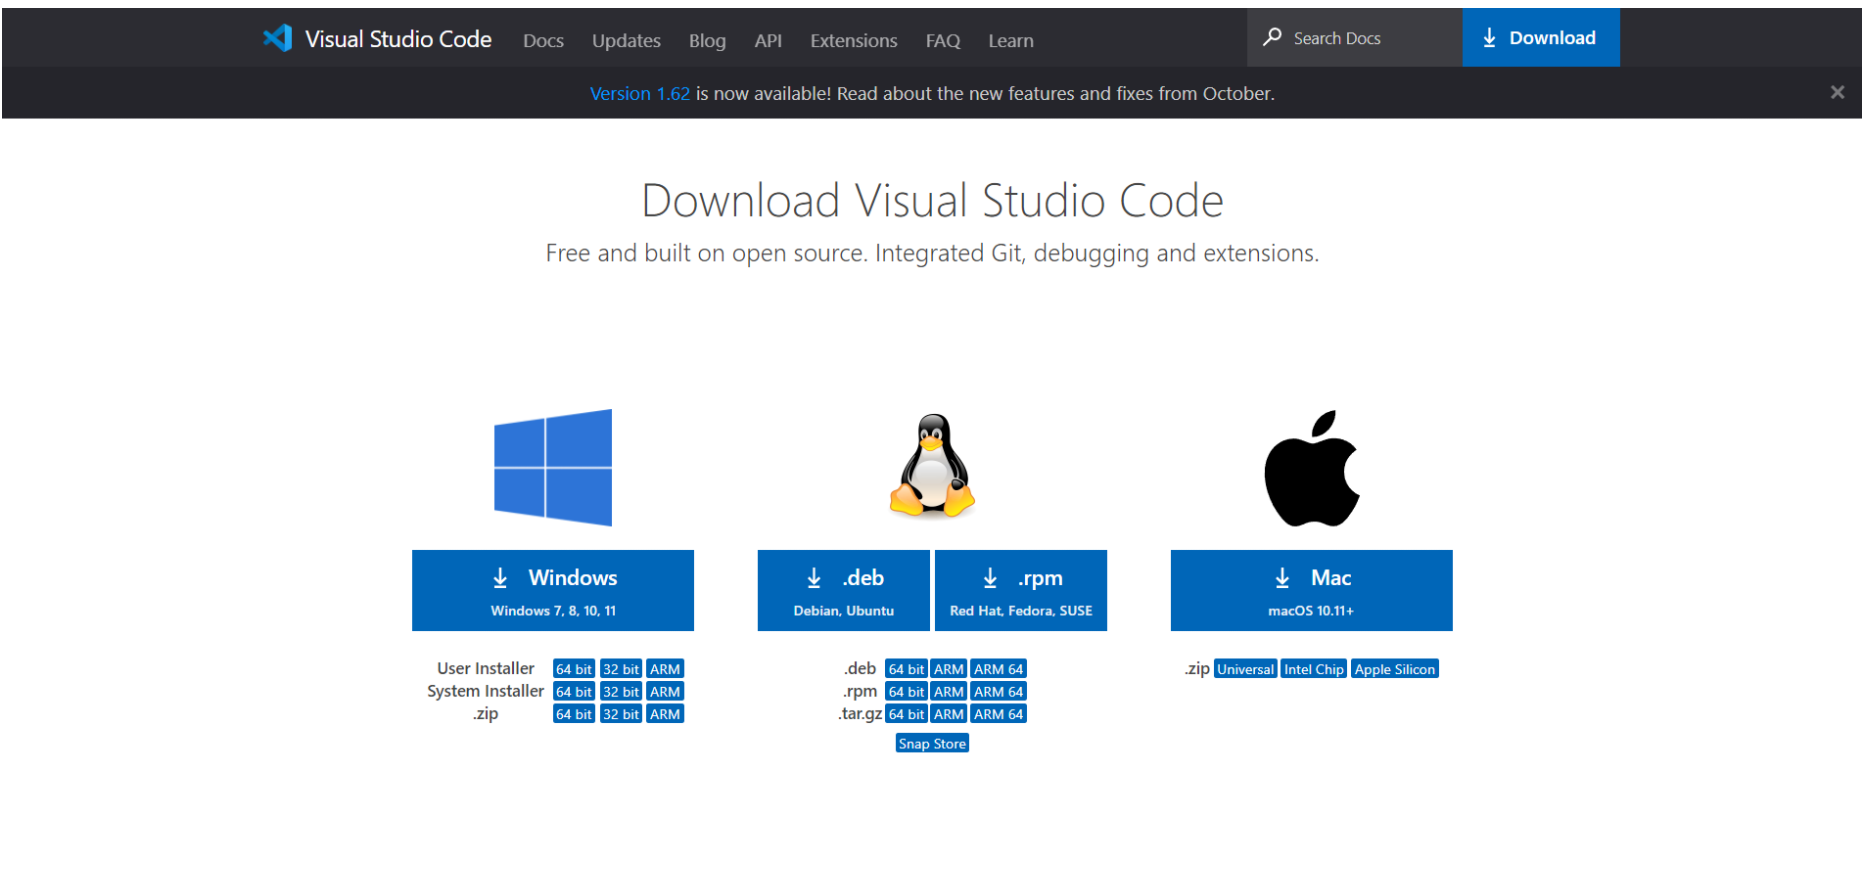
Download the latest VS code for Windows: https://code.visualstudio.com/download
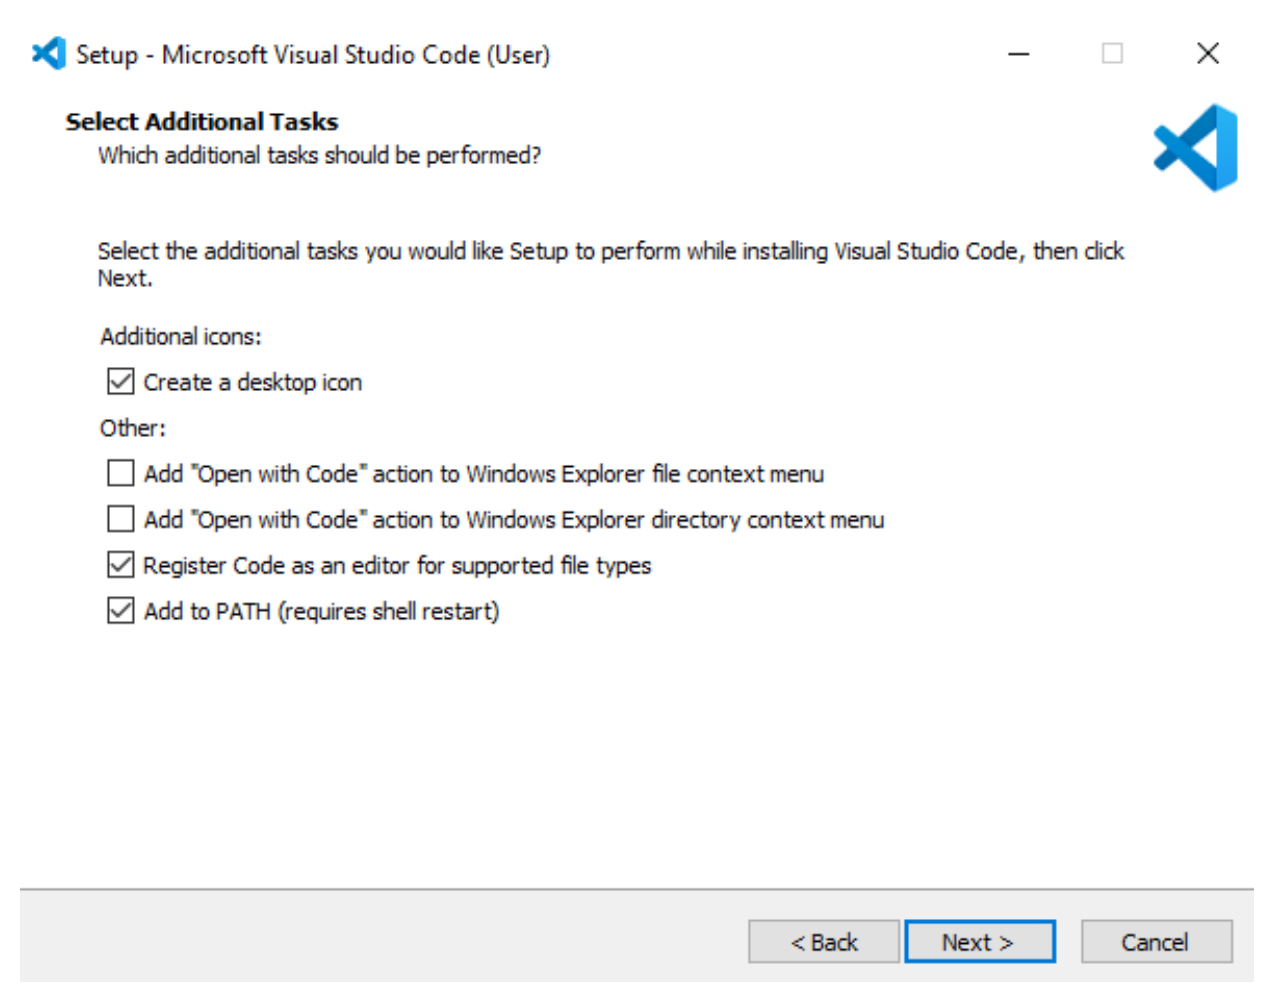
Follow the installation wizard, check the options as shown below.
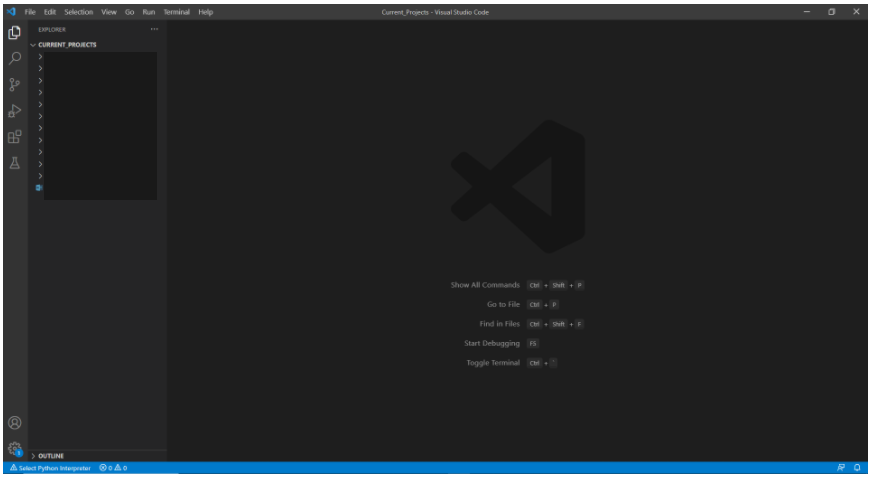
Once installed, open VS Code on Desktop. You will see the following interface.
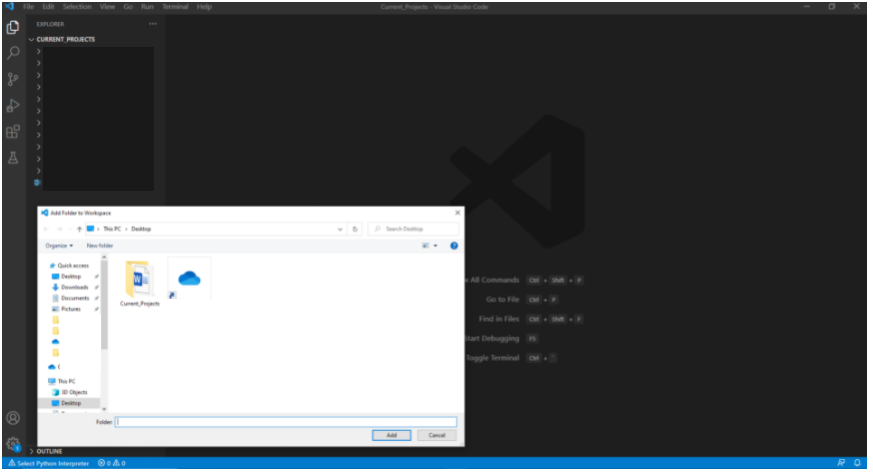
Add your work folder in Explorer by right-clicking Explorer -> Add Folder to Workplace...
Step 2: Activate PLAXIS Environment
Once your virtual environment and IDE are set up, you can start writing Python scripts within IDE. To write a Python script, you should follow the process below:
- Open IDE terminal
- Direct to your preferred work folder (in terminal)
- Activate PLAXIS Python Environment
- Create .py file in the folder
Open IDE terminal
Click the highlighted icon:
![]()
You will see the Shell comes up:
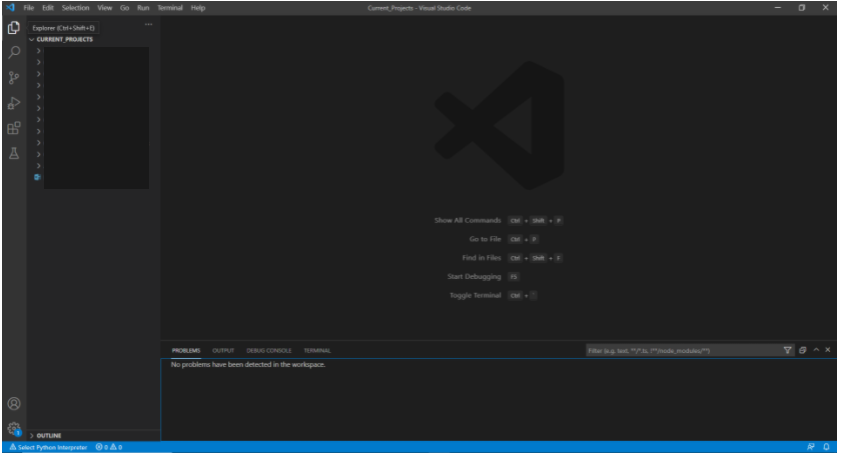
Head to "Terminal" tab. You should see that you are in the work folder.
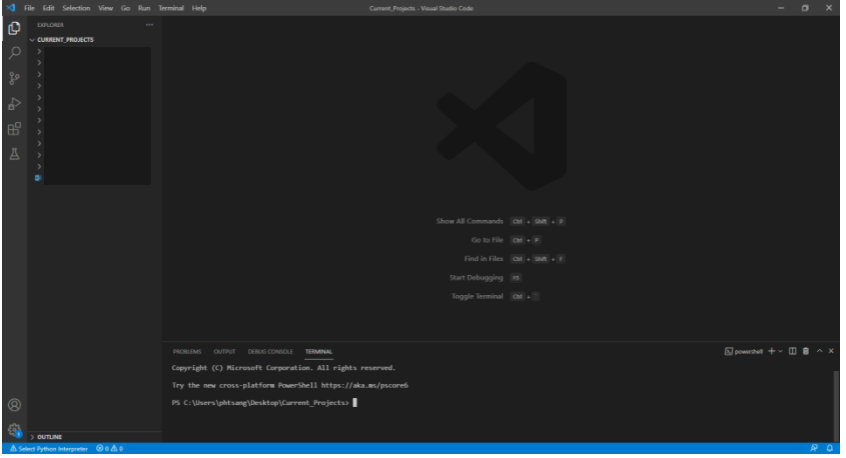
Direct to your preferred work folder
If it is not the correct work folder. You can type:
cd
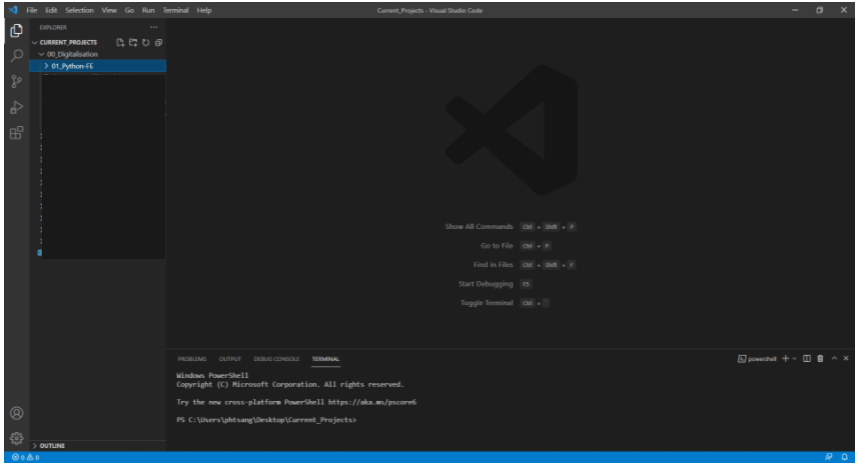
For example, I am currently in Current Projects folder and I want to locate to 00_Digitalisation->01_Python-FE. The folder path is:
C:\Users\phtsang\Desktop\Current_Projects\00_Digitalisation\01_Python-FE
In IDE terminal:

It should show the correct folder name as shown above.
Activate PLAXIS Python Environment
To activate the PLAXIS Python environment, we will need to select PLAXIS built-in python interpreter which contains all the functionalities required to operate PLAXIS. The python interpreter is automatically installed when PLAXIS is installed.
Location of the Python interpreter:
C:\ProgramData\Bentley\Geotechnical\PLAXIS Python Distribution V2\python\python.exe
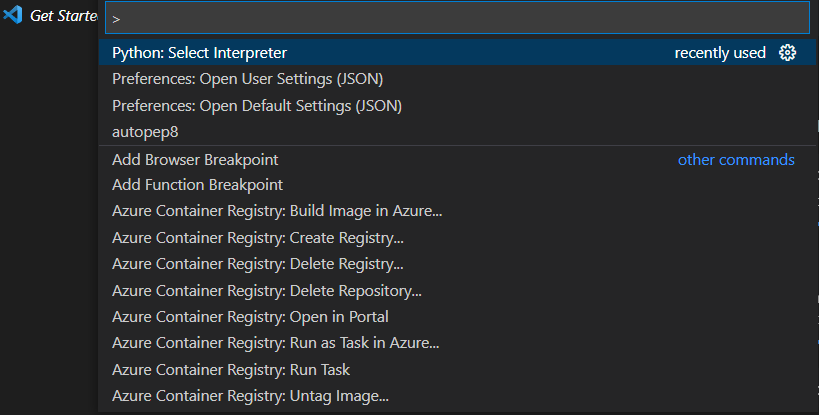
To select a specific environment, use the Python: Select Interpreter command from the Command Palette (Ctrl+Shift+P). Click "Enter interpreter path..." , then browse the python.exe in the location mentioned above.
In the Terminal tab, select Command Prompt in the drop-down list as highlighted below.

You should see (PLAXIS) in front of the working directory if the environment is activated successfully.

Create .py file in the folder
Click the New file icon:
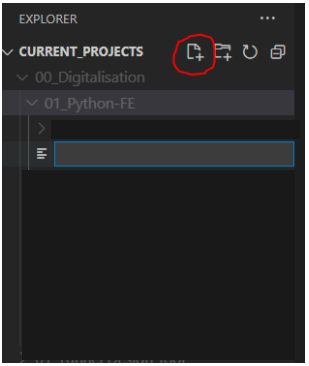
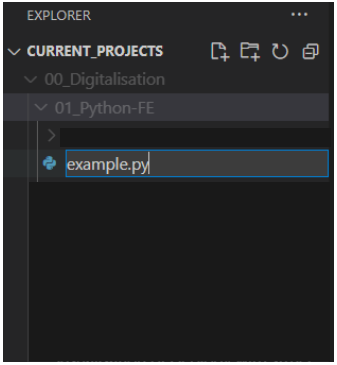
Create .py file as below:
Next section we will start connecting to the PLAXIS API.
Start building apps for free
Step 3: Connect PLAXIS API
I will first create an empty python script and call it "create_plate.py" as shown below.

After that, we write the code below to the python file. Three things are doing here:
- Import modules from PLAXIS Python environment. In order to operate PLAXIS with Python script, we need to use the functions (more commonly known as methods in terms of programming) developed by PLAXIS. The module we import is called "plxscripting.east"
- Open PLAXIS 2D desktop application. The path of the Plaxis2DXInput.exe should be the same as listed below if default installation path is adopted. If that's not the case, simply change the path to the correct directory. Port number and Password can stay as default but you can select any values you want.
- Start the PLAXIS scripting server with the pre-defined port number and password.
1from plxscripting.easy import *
2import subprocess, time
3
4PLAXIS_PATH = r'C:\Program Files\Bentley\Geotechnical\PLAXIS 2D CONNECT Edition V22\\Plaxis2DXInput.exe'  # Specify PLAXIS path on server.
5
6PORT_i = 10000  # Define a port number.
7PORT_o = 10001
8
9PASSWORD = 'SxDBR<TYKRAX834~'  # Define a password (up to user choice).
10
11subprocess.Popen([PLAXIS_PATH, f'--AppServerPassword={PASSWORD}', f'--AppServerPort={PORT_i}'], shell=False)  # Start the PLAXIS remote scripting service.
12
13time.sleep(5)  # Wait for PLAXIS to boot before sending commands to the scripting service.
14
15
16# Start the scripting server.
17
18s_i, g_i = new_server('localhost', PORT_i, password=PASSWORD)
19s_o, g_o = new_server('localhost', PORT_o, password=PASSWORD)
20
21
22s_i.new()
23
24g_i.gotostructures()
To test that the code above is working properly, we will run "create_plate.py" in the terminal as shown below. Type "python create_plate.py" and click Enter.
1(PLAXIS) C:\Users\phtsang\Desktop\PLAXIS_V22\Script>python create_plate.py
The PLAXIS 2D app should be opened automatically. If the server is configured correctly, you should see "SERVER ACTIVE" as shown below.
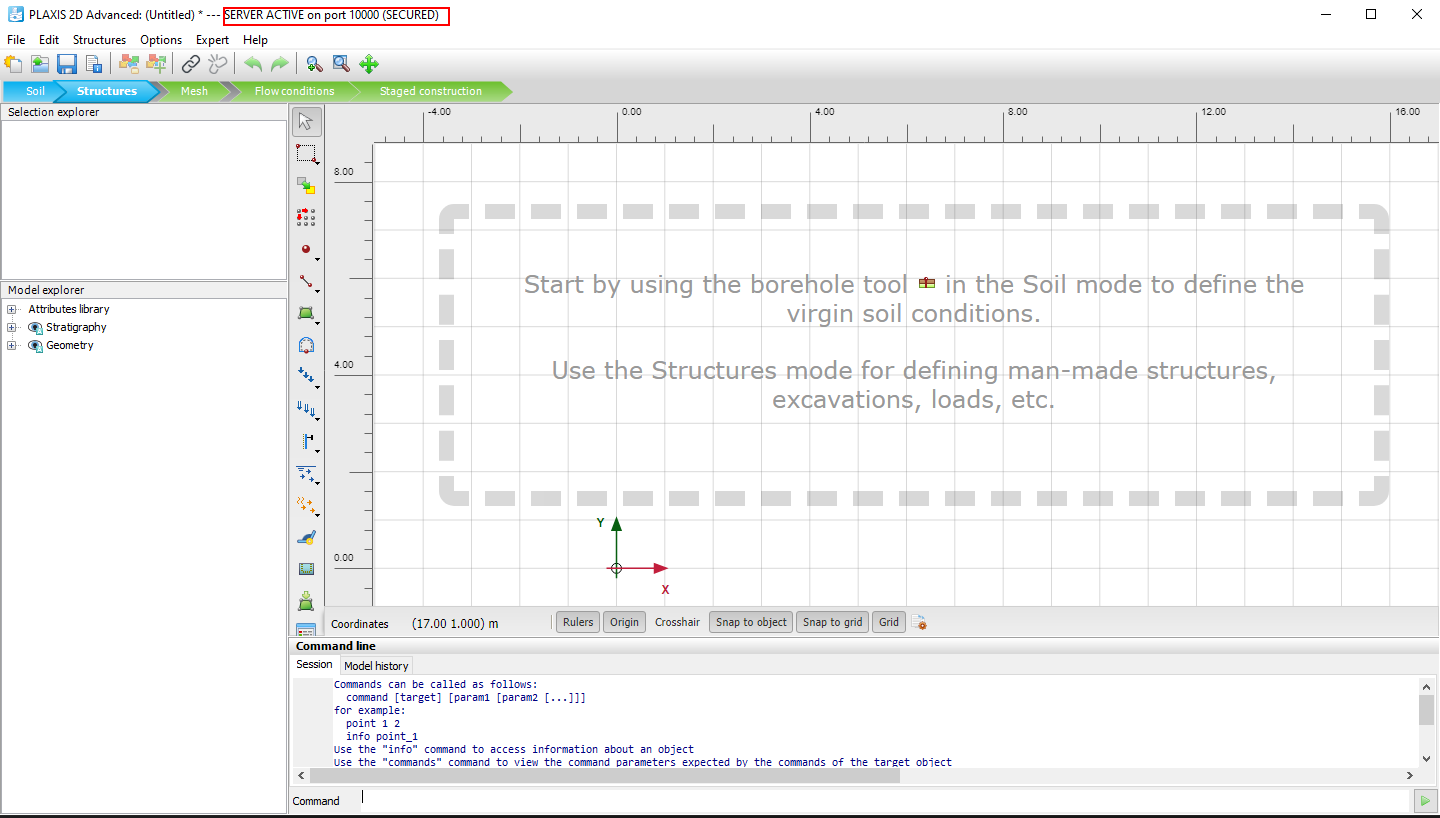
Now that we connect to the PLAXIS API server, we can then create a plate element in PLAXIS using Python script.
Step 4: Create First Plate Element
In this part of the tutorial, we aim to create a plate element with positive and negative interfaces. Then we assign "Concrete" material to the element.
First, we define the material name and geometry. I plan to create a line from (-10,0) to (10,0). The square bracket [ ] is called list in python, which is a very common data type to store values. To access the values stored in a list, it is called in the following syntax:
If I want to access the coordinates of first point, I use
x coordinate = -10 = first_point[0]
y coordinate = 10 = first_point[1]
0 and 1 here called index which always starts from 0.
Then we create the material and assign it to the plate material list. To create plate material, the command "g_i.platemat()" is used. The code underneath is to assign the plate object to a list.
1material=['Concrete']
2first_point=[-10,0]
3second_point=[10,0]
4
5# Create material
6for i in range(len(material)):
7    g_i.platemat('Identification',material[i])
8
9
10platematerials = [mat for mat in g_i.Materials[:] if mat.TypeName.value == 'PlateMat']
After that, we create plate element with "g_i.plate()" based on the pre-defined coordinates.
1plate=g_i.plate(
2    (first_point[0],first_point[1]),
3    (second_point[0],second_point[1]),
4    )
5plate1=plate[-1]
Then, create interfaces using "g_i.posinterface()" and "g_i.neginterface()".
1plate2=plate[-2]
2g_i.posinterface(plate2)
3g_i.neginterface(plate2)
Finally, set "Concrete" to the plate element.
1plate1.setmaterial(platematerials[0])
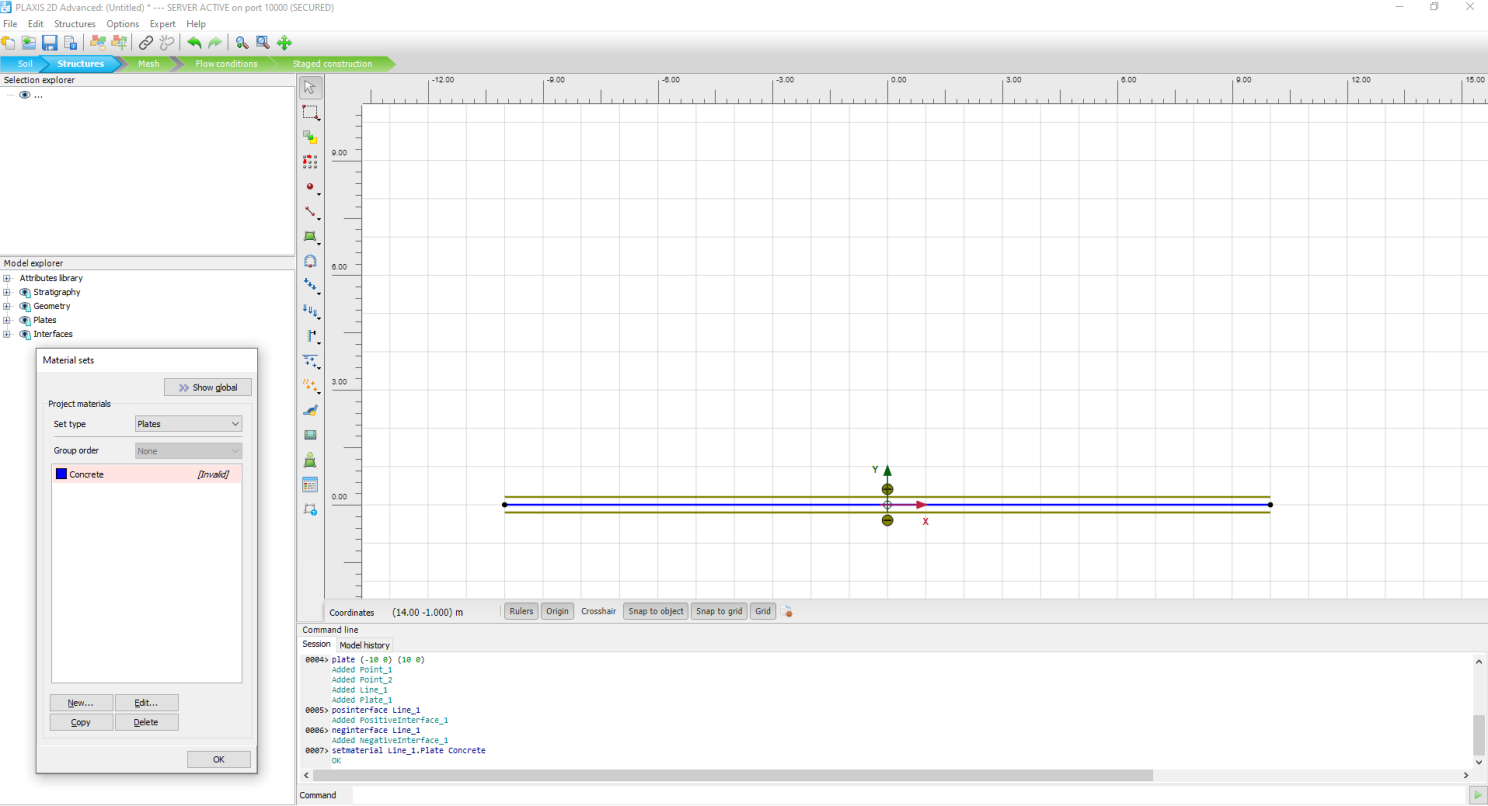
If you rerun the script, you will see the following is created in PLAXIS. As you see, the "Concrete" material is created and is assigned to the plate element we created.
Congratulations! You have just created your first plate element in PLAXIS using Python!
Start building apps now
Bonus: Create 4 Plates Elements
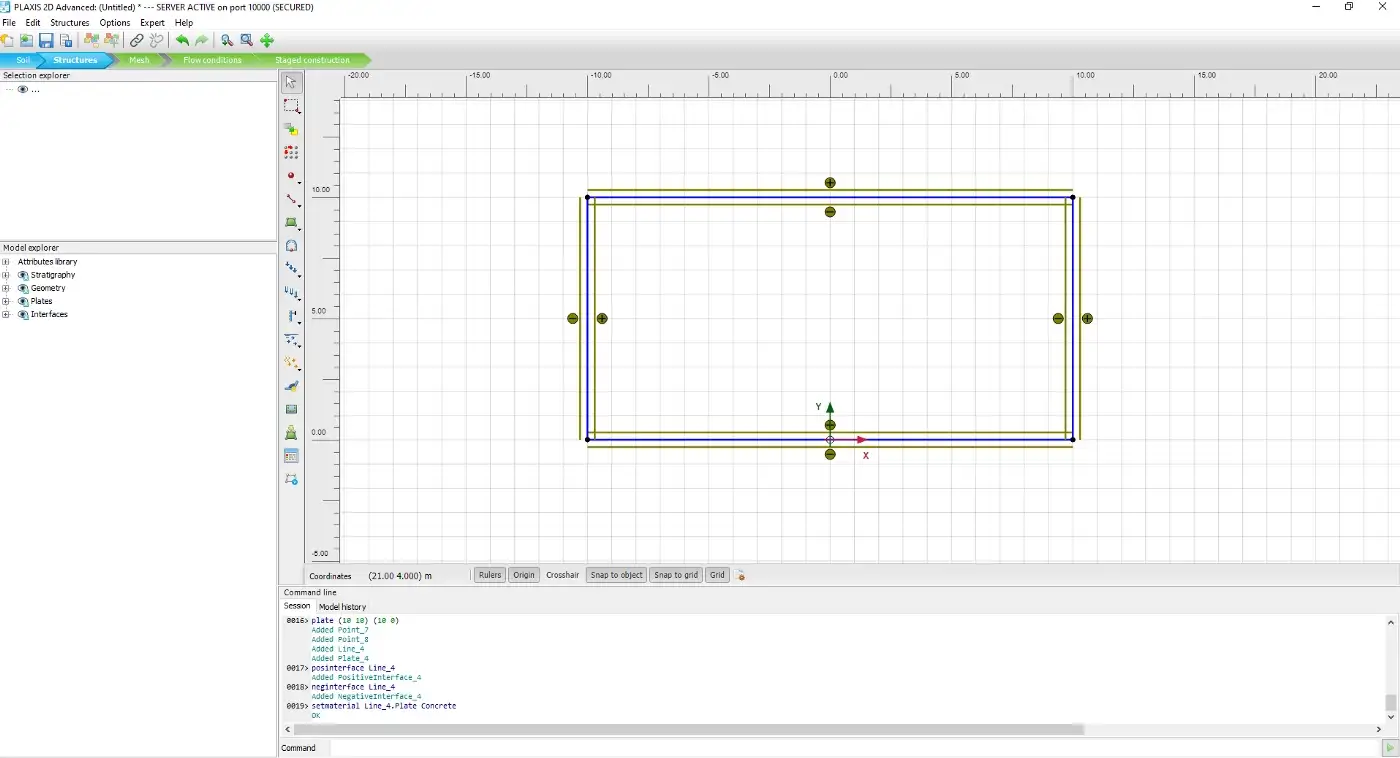
Of course, we often need to create more than one structural element in PLAXIS. In this section, we aim to create four plate elements which form a rectangle with the following coordinates:
(-10,0), (-10,10), (10,10) and (10,0)
We need to first create a list (call it 'df_plate') which specifies the coordinates of each plate element. The first and second points are stored as (x1,y1) and (x2,y2) respectively. Within the list, I used a new data type called Dictionary which is very commonly used in Python. More on that in the next tutorial.
1df_plate=[{'x1':-10,'y1':0,'x2':10,'y2':0},{'x1':-10,'y1':10,'x2':-10,'y2':0},{'x1':-10,'y1':10,'x2':10,'y2':10},{'x1':10,'y1':10,'x2':10,'y2':0}]
Since this time we need to access multiple elements in a list, we will utilise a concept called for loop. It allows us to loop through the elements and create points in PLAXIS accordingly. This can be done with the following code:
1for i in range(len(df_plate)):
2    plate=g_i.plate(
3        (df_plate[i]['x1'],df_plate[i]['y1']),
4        (df_plate[i]['x2'],df_plate[i]['y2']),
5        )
6    plate1=plate[-1]
Your final script should look like:
1# Plate
2#Material name and geometry
3material=['Concrete']
4
5df_plate=[{'x1':-10,'y1':0,'x2':10,'y2':0},{'x1':-10,'y1':10,'x2':-10,'y2':0},{'x1':-10,'y1':10,'x2':10,'y2':10},{'x1':10,'y1':10,'x2':10,'y2':0}]
6
7# Create material
8for i in range(len(material)):
9    g_i.platemat('Identification',material[i])
10
11platematerials = [mat for mat in g_i.Materials[:] if mat.TypeName.value == 'PlateMat']
12
13#Create Plate
14for i in range(len(df_plate)):
15    plate=g_i.plate(
16        (df_plate[i]['x1'],df_plate[i]['y1']),
17        (df_plate[i]['x2'],df_plate[i]['y2']),
18        )
19    plate1=plate[-1]
20
21#Create Interface
22
23    plate2=plate[-2]
24    g_i.posinterface(plate2)
25    g_i.neginterface(plate2)
26#Set Material
27
28    plate1.setmaterial(platematerials[0])
If you rerun the script, you will see the following is created in PLAXIS. Now, you are able to create multiple elements using Python script.
What's next
That's the end of the first tutorial on automating PLAXIS with Python. Here you can find all tutorials to keep improving your automation skills:
Tutorial 1: Start Using Python to Automate PLAX
Tutorial 2: Extract PLAXIS results automatically using Python
Tutorial 3: PLAXIS result visualization using Python
Tutorial 4: Create a PLAXIS model based on a Excel sheet using Python
If you're interested in hearing more about Python, PLAXIS and workflow automation, feel free to follow my LinkedIn page. You can also support me by following me on Medium where I will provide source code and more general programming techniques in the future.
