Learn how to automate structural engineering with AI agents in this webinar

Base plates are one of the most critical parts of a structure because most of the loads pass through them and into the foundation, and almost all steel structures have them, so it's quite important for engineers to ensure they are properly designed.
Not long ago, I used Excel for base plate design. The main pain point for me was the lack of interactive visuals—typing numbers in cells isn't the same as seeing a 2D view of the baseplate. Also, I wished I had automatic reporting instead of manually copying results to Word and a way to collaborate better with my team.
So in this blog I'll showcase how the app builder can help you solve these issues, and you'll have hands-on experience by running 3 prompts. We'll also give you some ideas on how to extend this application, so we will cover:
-
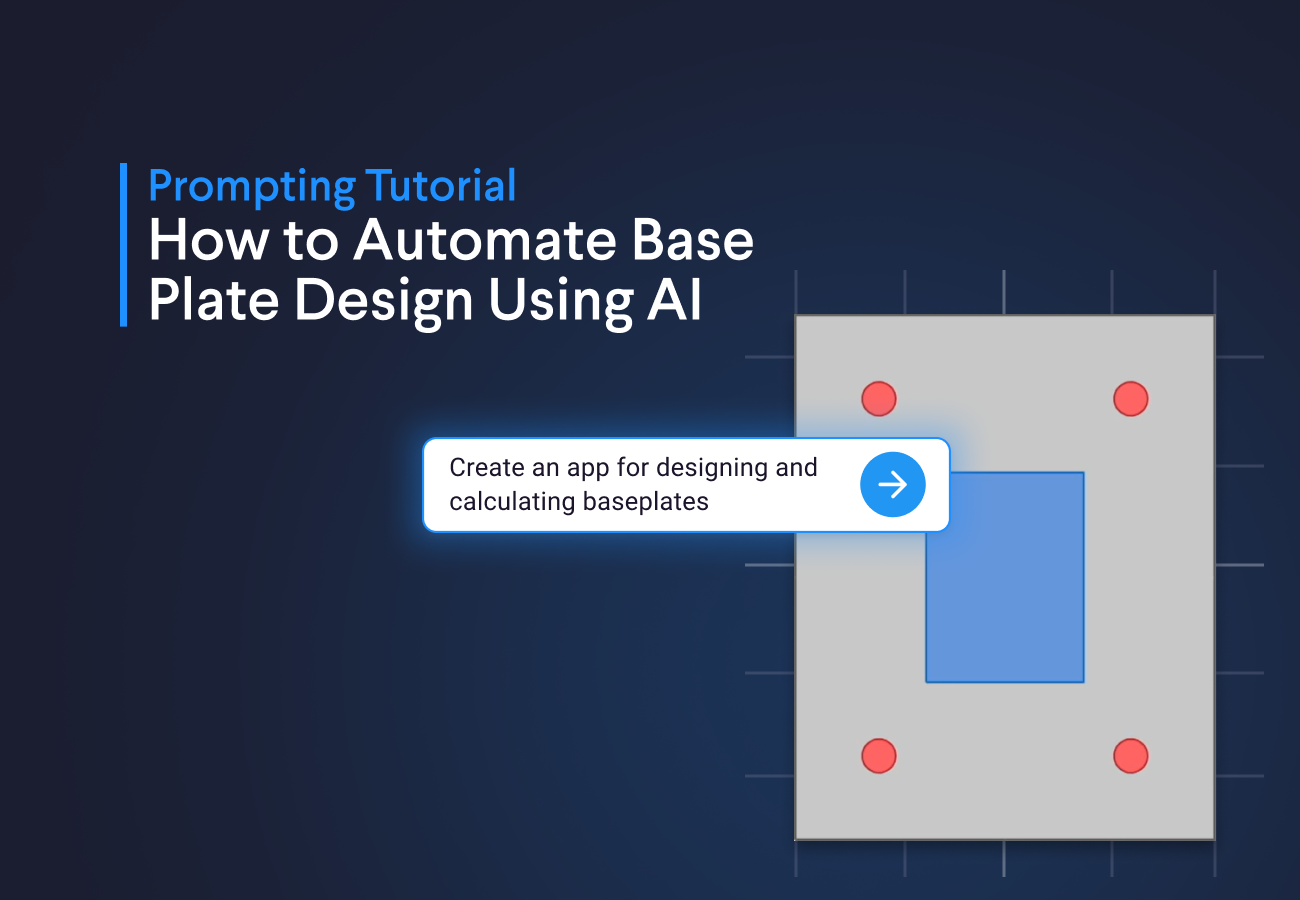
Prompt 1: Create an interactive base plate layout: You will create an interactive visualization to iterate and check the layout, avoiding clashes.
-
Prompt 2: Generate structural calculations from engineering documents: You will share a PDF with engineering checks that the App Builder will turn into the app logic, avoiding AI hallucinations and ensuring safe baseplate design.
-
Prompt 3: Automate reporting: Generate a simple report with the summary of the calculation results to have everything integrated in one tool.
-
How to extend application: So you can build more features yourself and generate custom and shareable tools for you and your team.
Prompt 1: Create an interactive base plate layout
Having an interactive visualization of the base plate layout is important because it makes the design easier to understand and verify. You can clearly see the anchor bolts, check edge distances and clearances, and confirm that the layout matches what will be built.
Compared to Excel, where the design is mostly numbers, this interactivity is missing. You often have to switch to AutoCAD or make a hand sketch just to confirm the layout, which slows the process and increases the chance of mistakes. It happened to me that I had a nice design in Excel, and then when it came to drawing, the bolts were clashing with the column.
Let's create our interactive base plate layout using the following prompt to launch the App Builder:

Baseplate Visualizer
Prompt 2: Generate structural calculations from engineering documents
With the interactive base plate layout in place, to generate the application logic, we can take advantage of the App Builder's PDF understanding capabilities. We will share a PDF with engineering checks and provisions, and the App Builder will extract the equations and assumptions, then turn them into the app logic. This makes it easier to validate the implementation and keep the logic tied to the original references.
You can download the following PDF with an engineering guide on how to estimate baseplate thickness. It was taken from IBRACON Structures and Materials Journal • 2018 • vol. 11.
Then you can copy the following prompt and upload the PDF so the App Builder can extract the equations and implement them.
1Now for the calculation logic use the attached PDF and implement the Section Base plates subject to compression force with large moment
2
3Consider:
4- Important: Implement only the logic for Rectangular hollow sections
5- The first section of the app should contain the equations used and references from the PDF.
6    - Use a vkt.Text with LaTeX equations, no indentation inside triple quotes to ensure equations render correctly.
7    - Also if you make assumptions state them in a vkt.Text
8    - No more than 1000 characters in this section, condensed but thorough
9- For the loads use 10kN and 5kn*m
10- Be careful with the units, make double checks on them!
11- Add a dataview with the calculation results.```
After the App Builder generates the design check, you can validate the results by reviewing the equations and testing the output. Since we're using a PDF, it's easier to verify the logic. You can also invite colleagues to collaborate in the App Builder, which helps with validation and distribution of your apps.
Prompt 3: Automate reporting
Finally, we can also automate the report and export the main results to a PDF. There are multiple ways to generate reports in VIKTOR, and we will use the simplest one: a basic PDF report.
1Now generate a button that allows me to download a PDF report with all the calculations made in the app. ```Now let's go through some ideas you can use to extend the app.
How to Extend the Application
The last prompt was a bit short on purpose. The idea is for you to play around with the App Builder and customize this tool to your needs, so here are a couple of prompts you can use to spark your inspiration:
-
You can improve the report that we generate by adding the layout and the equations with a prompt like: "In the first section of the report add an image of the Baseplate layout and also add the detailed calculation rendering the equation"
-
Generate a WebView to display the intermediate steps of the calculations. You can prompt: "Generate a webview with the equations being rendered using MathJax. Be very descriptive in the calculation to allow a thorough revision of it, include units and assumptions"
-
Export the results in Excel or add a TableView highlighting the report. Use a prompt like: "Generate a table view with a summary of the results and also generate a button to export the results in xlsx format"
-
Add an optimization button where you can compare different alternatives by changing the baseplate sizes, bolt edge distances, and plate thickness. Use a prompt like: "Generate an optimization button that calculates the optimal baseplate configuration considering material cost and structural requirements"
Conclusion
In this blog, you learned 3 prompts to automate base plate design, from creating interactive visualizations to implementing engineering calculations and generating reports. This gives you a solid foundation to start automating connection design and saving time on repetitive tasks. If you'd like to share the app with your team or explore more advanced features, book a demo and a VIKTOR expert will be happy to help you get started.
Start building apps for free